
How to Use Waterfall
The waterfall pump is located on the side of the waterfall opposite the patio, inside a rock-surrounded pit area.
The waterfall is programmed to run automatically twice daily:
9:00 AM – 12:00 PM
3:30 PM – 8:00 PM
Please note that the timing may vary slightly due to the internal clock settings. We ask that guests do not adjust the programmed schedule.
If you would like to manually turn the waterfall on for a short period of time, press the “Speed 3” button and then press the “>” button. This will activate the pump and start the waterfall.
If the pond water level becomes too low and the pump is not drawing water properly, there is a spigot located on the bar side of the pavilion along with a hose that may be used to refill the pond portion of the waterfall.
To manually turn the waterfall off, press the “Resume/Stop” button.
Helpful home information
Here are a few items you may use during your stay and where they are located:
Fire Extinguisher - Located on the shelves above the washer and dryer.
Trash Bins - The indoor trash cans are located to the left of the sink inside the pull-out drawer cabinet. The outdoor trash can is behind the building. Follow the path off the grill patio to the back of the building, where it is located next to the crawl space door.
Additional Pillows - Extra pillows are stored under the bed/sofa in the center pull-out section, which also doubles as a coffee table.
Cleaning Supplies - Most cleaning products are under the sink. A vacuum is located in the right-side pull-out drawer beneath the bed/sofa.
Remotes - A bin labeled “Remotes” is located on the kitchen counter to the right as you walk through the front door.
Coffee and Filters - Located in the white ceramic canisters near the coffee maker. Each canister is labeled.
Cornhole Bags - Under the outdoor bar in a cloth bag.
Extra Propane for Grill - An additional propane tank is located around back, next to the outdoor trash can.
Modem - The modem is located on top of the refrigerator in case it needs to be reset during your stay.
Extra Firewood - A stack of firewood is located in the turnaround just up the road from the pavilion, and a wheelbarrow is available to help transport the wood.
Extra Toilet Paper and Paper Towels - Additional paper products are stored in the drawer to the left under the sofa/bed. Extra toilet paper may also be found in the cabinet under the sink.
Indoor Dining Table
To use the indoor table there are collapsable chairs hanging over the washer and dryer. To lower the table simply release the gate lock holding it to the wall and lower the table. There are two pilot holes in the floor that correspond to two pegs on the bottom of the farm style leg. Line these up and lock the leg in place. Then the table is ready to use.
The property
There is a graveyard near the pavilion, and you are welcome to walk the grounds and appreciate the history that rests here. We simply ask that all guests remain respectful and refrain from damaging headstones or disturbing the gravesites in any way.
The property spans 18 acres, and you are welcome to explore beyond the turnaround point along the road, which will be extended in the future. From the turnaround area, the property extends to the top of the mountain ahead and down to the creek below. The terrain is mountainous and rugged, and while we encourage guests to enjoy the land, we do ask that you use caution while exploring. Wildlife including bears, snakes, feral dogs, and other animals have been seen on the property.
As the property continues to grow, there may occasionally be construction or development projects underway. We ask that guests admire the future improvements from a distance and stay clear of any active work areas for safety reasons. Please know that the property is very spacious, and all guest rental areas are designed to maintain privacy and ensure your stay remains peaceful and enjoyable.
SOFA to bed conversion
How to Convert the Sofa into a Bed
To convert the sofa into a bed, stand at the base of the sofa. You will see two yellow tabs protruding from the white shelving area on the front of the unit. Press both tabs downward, and the bed platform will begin to slide forward. You may need to gently pull the bed outward using the built-in handles to assist.
The bed will extend partway and then lock into place. Press the yellow tabs again to fully extend the bed.
Once fully extended, locate the fold-down support legs positioned on both sides and in the center underneath the end of the bed. Reach beneath the suspended portion and pull the legs down into place to support the end of the bed.
—————————————————————————————
How to Convert the Bed into a Sofa
Remove the pillows from the head of the bed and place them near the foot of the bed. Fold the support legs back up so they are parallel with the bed frame, allowing the end of the bed to float freely again.
If you have another person assisting, one person can remain at the foot of the bed to help push while the other lifts. If you are doing this alone, move to the side arm closest to the refrigerator. Underneath the mattress, you will find a black handle. Begin by lifting the mattress into a “^” position. While supporting the mattress, pull upward on the handle to begin raising the bed back into the sofa position.
Once you have lifted the bed as high as comfortably possible, keep one hand supporting the mattress in the “^” position. Then move to the base of the bed and gently push it inward until it collapses fully back into the sofa position. If working with a partner, one person can pull the black handle while the other pushes from the foot of the bed to make the process easier.
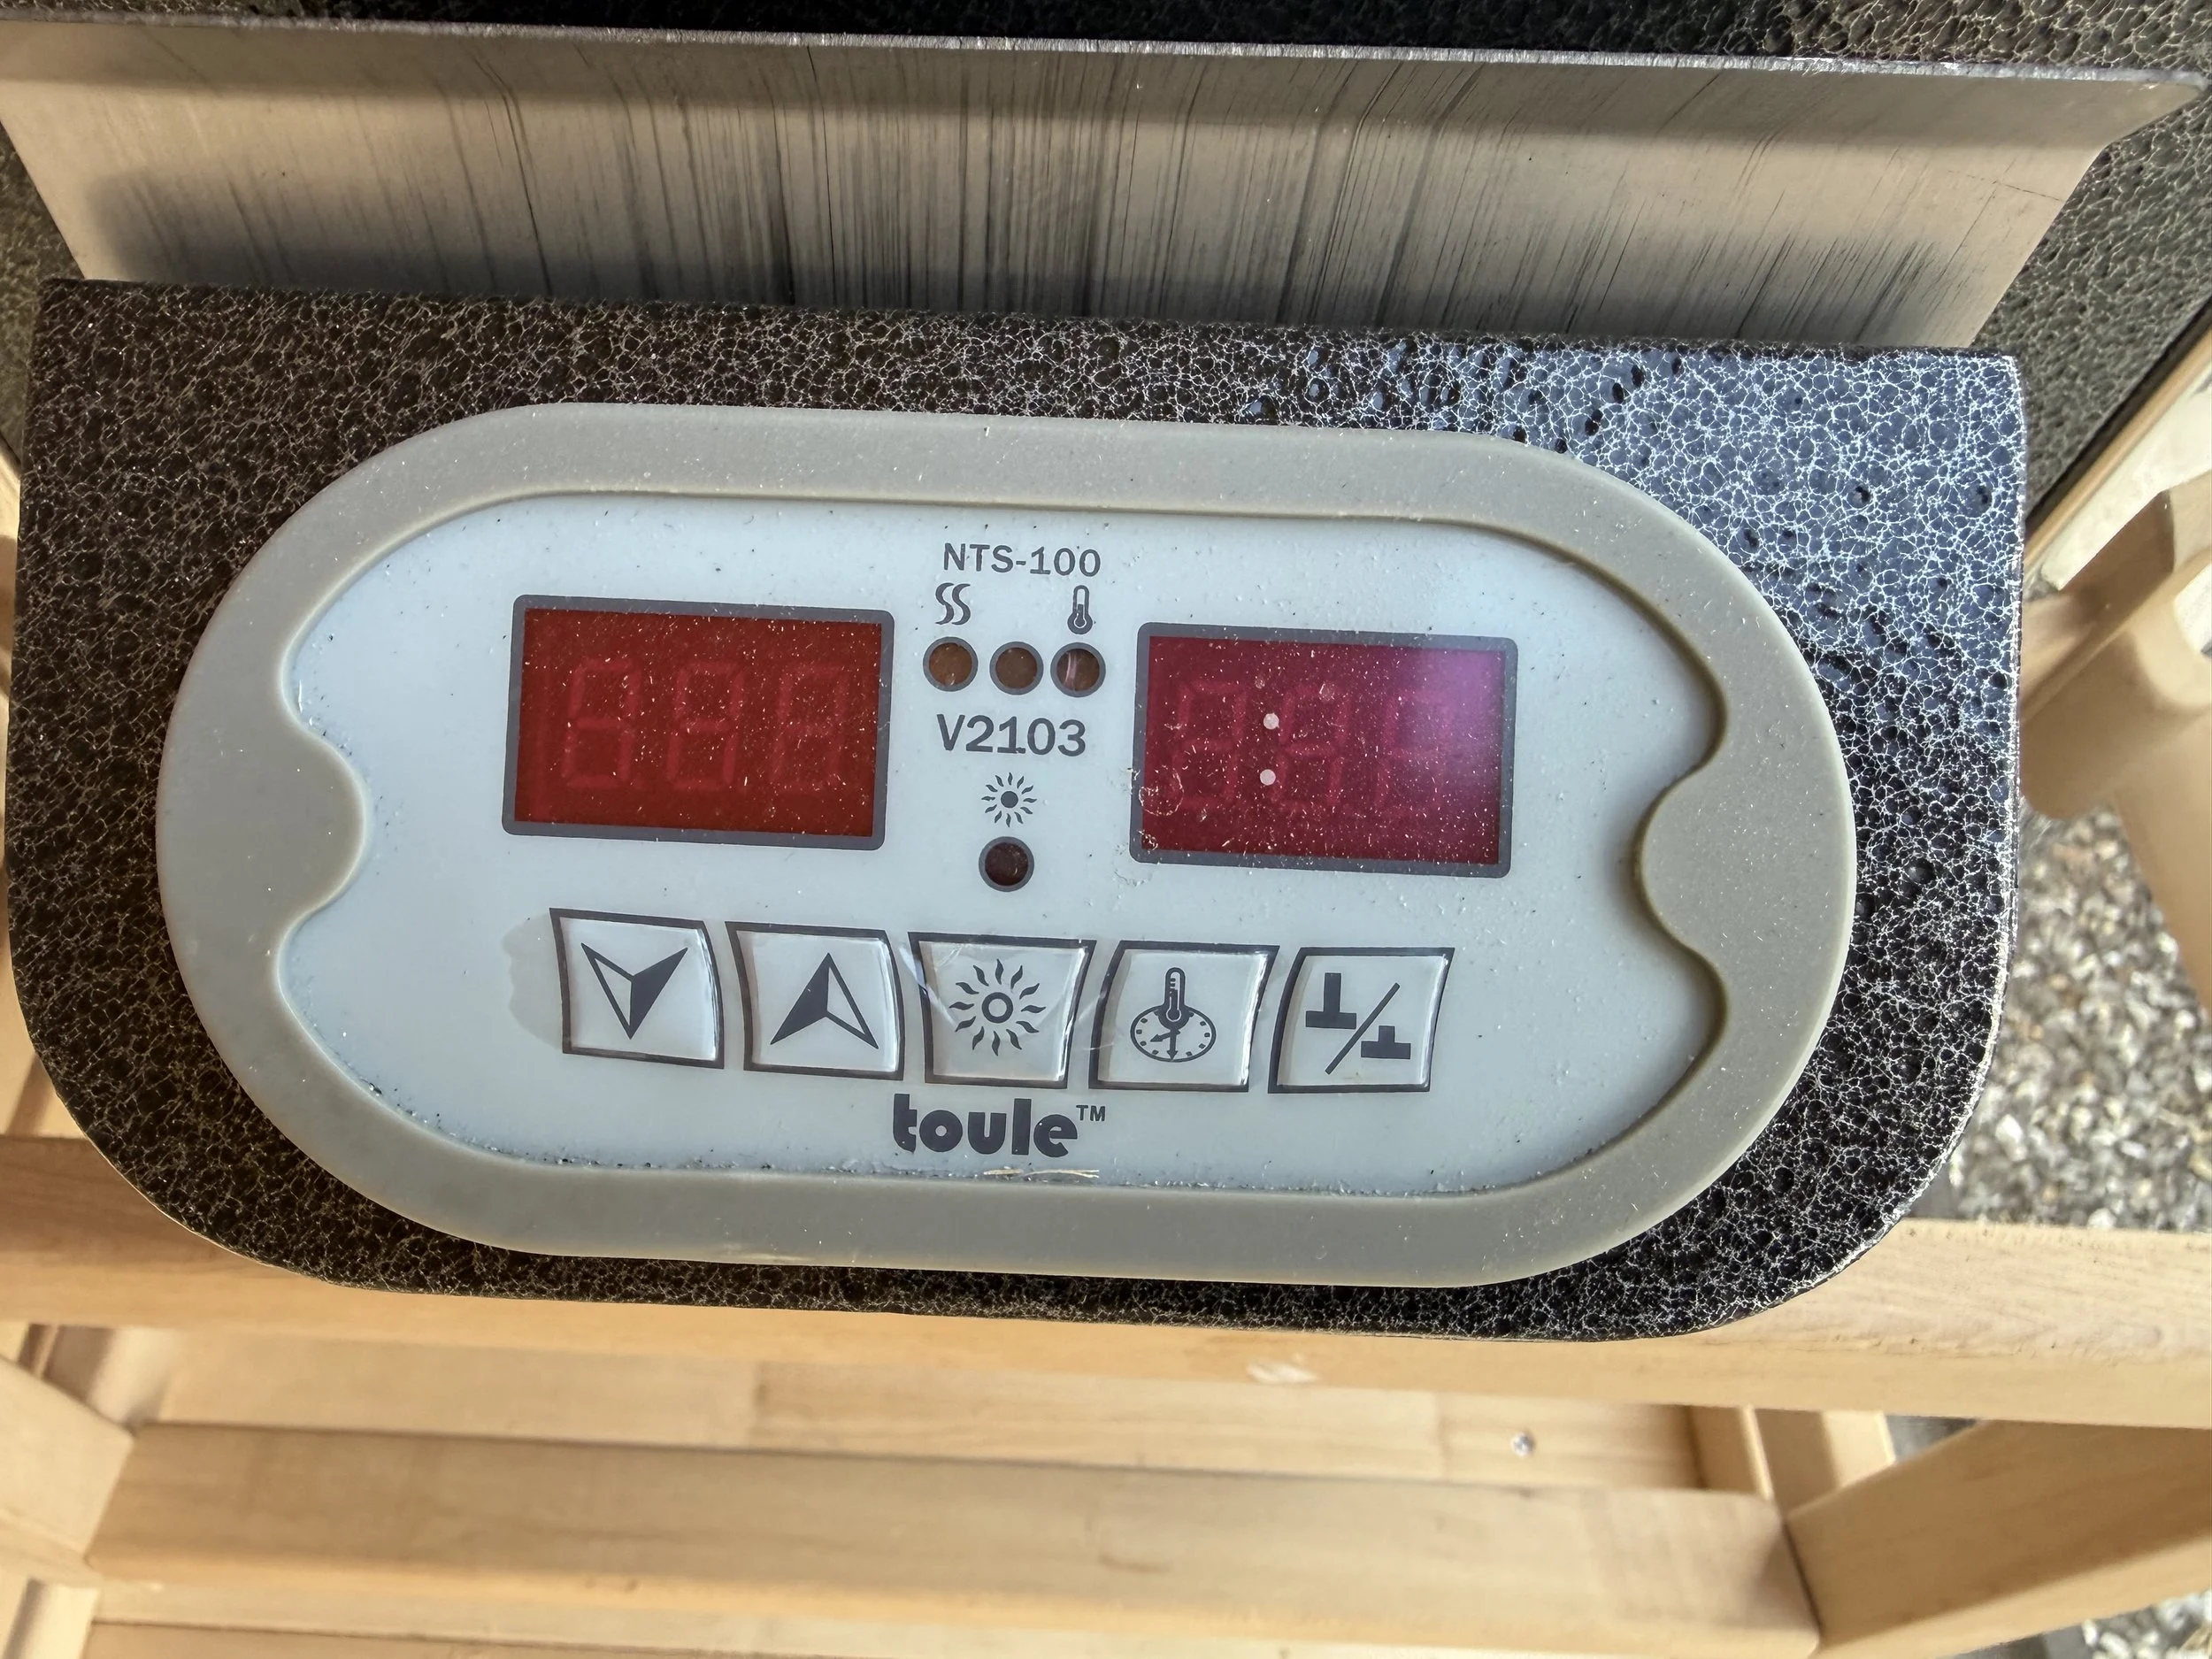
Sauna
Power On/Off - Press the far right button to activate or deactivate the heater.
Temperature Setting - Press and hold the Power button (far right button), until the temperature display flashes. Then use the up/down arrows to adjust the sauna to the desired temperature. The display will show the set temperature, as well as the current sauna temperature.
Timer Setting - Press the second button from the right and use the up/down arrows to adjust the operating duration. The heater will automatically shut off after the set time.
Overhead Indoor Light - Press the middle button to turn the light on/off
Bench Lighting - On the back bench there is a toggle switch that operates the LED lights in the back bench.
Additional Equipment - A squeegee is located in the wooden caddy, for your convenience, if you would like to clean the glass while inside. A bucket and ladle are also available for use. You may fill the bucket using either the sink inside or the outdoor spigot located on the side of the house near the bar.
Dry Sauna - Operate the heater without pouring water on the stones. This provides dry heat experience
Wet Sauna - Carefully ladle small amounts of water onto the hot sauna stones. This creates steam and increases humidity for a wet sauna experience. Do not pour large quantities of water at once. Please make sure the stones come up to temp before labeling the water, so it does not simply flow through to the bottom of the heater and not evaporate.
TROUBLESHOOTING - If the control panel is lit up and operational but the unit is not heating, the unit may need to be manually reset. The reset button is located on the bottom left side of the unit when facing it. It is covered by a black cap, which must be removed before pressing the reset button. After pressing the reset button, simply power the unit back on using the far-right button on the operating panel.